Showing posts with label homemade. Show all posts

Monday, 28 November 2016

Changing Blankets to make a better design

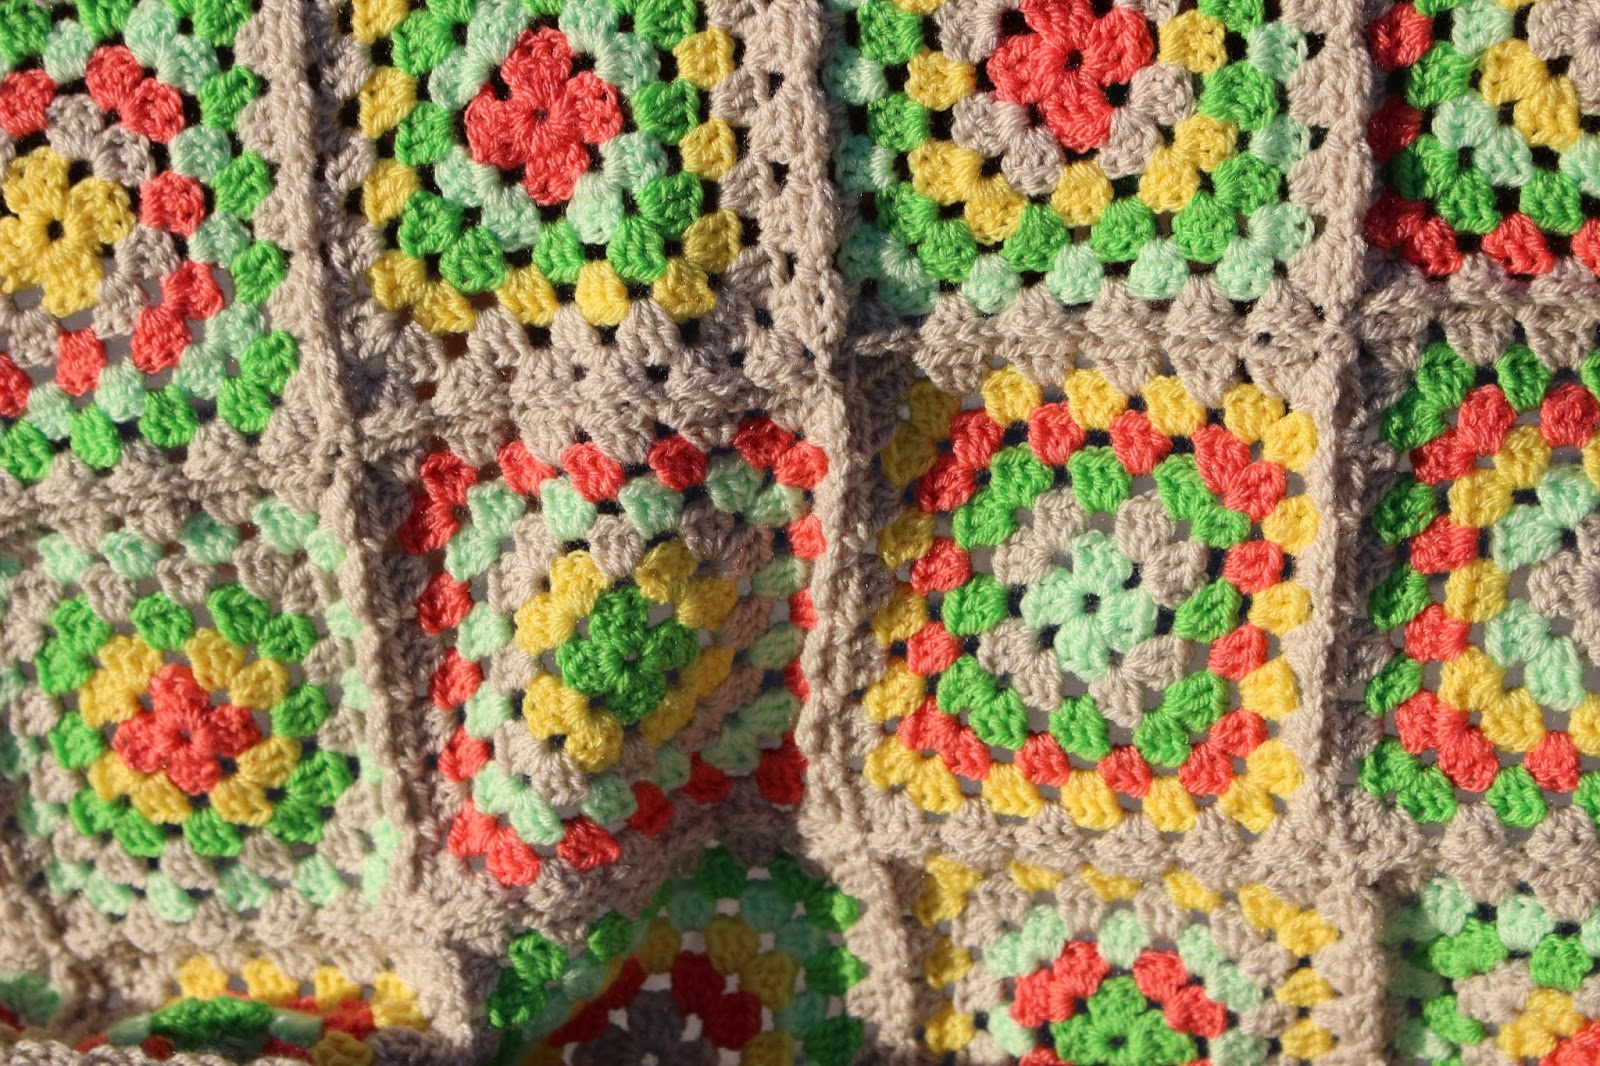
Back in May I posted about a baby blanket I had made.  Its been up for sale in my etsy shop since May and I haven't been able to sell it.  So I decided it needed to be changed to make it more appealing.  So I frogged all of the double crochet joining the granny squares.  I decided I would try the join as you go method from Attic 24.  This blanket is made from traditional granny squares and is made from Stylecraft Special DK wool in Grass Green, Spring Green, Citron, Shrimp and Parchment.  I had initially joined the squares together using Grass Green but for joining together I used Parchment.  It has made the blanket look really pretty.


As well as using the join as you go method and changing the joining colour to parchment I've also added some more squares to the blanket making it toddler/pushchair size of 30 x 40 inches.  So altogether the blanket is made up of 48 squares.  I've attempted to photograph it today as I've finished it and today was sunny.  My house was as grey and and dark as its been for many days now so I went to the park just 2 minutes around the corner from my house to take photos in the sunlight.  Whilst it was bright and sunny it was a tad blowy and so it was hard to get the blanket to keep still. 

I've still got some way to go to improve the photographs I take, I may have to sign up for one of the online photography courses run by Makelight to ensure I take much better photos.  I hope that with these changes my blanket is more appealing to the Etsy shopper.


Sunday, 15 May 2016

Crochet Granny Squares Pram Blanket

At the start of this year I made a promise to myself that I would blog more.  Well I've certainly not kept this resolution this year.  I've not posted much at all.  This hasn't mean I've not been crafting or making anything to blog about, because I have.

For quite a while on my pinterest board I've been collecting and posting pins with lots of different colour combinations.  I've been posting and saving these pins to inspire me on colour choices for making crochet blankets, cushions and all the different items I like to make.  So in February I picked a pin and order wool from the Wool Warehouse (my favourite website to order from).  The yarn was Stylecraft special DK acrylic (my favourite yarn to use) in the shades of Grass Green, Spring Green, Shrimp, Parchment and Citron.  This is the link to the pin which was my inspiration.  The inspiration was ice lolly's and who doesn't like Ice Lollies.


I made this blanket in February and it was the second blanket I completed this year.  I wasn't making this blanket for anyone else in particular.  I wanted to attempt to make a pram blanket and to put it up for sale on my etsy blog.  I used the different colour combinations pinned on my pinterest account and chose this colour combination.  I liked the fact that it was unisex and that it didn't contain any blue or pink.


I do enjoy making standard granny squares and I like the traditional look of them, even though the colour combination isn't traditional.  I usually make each square separately first and then join together.  This time I made all the first rounds for all the squares I wanted, then I completed the second rows, etc.  I have to admit I didn't enjoy making the squares this way, I think I like the satisfaction of completing each square when I've finished them, rather than having lots of part made squares. But in the process of making a blanket quickly, this is the quickest way of making one.


This blanket is for sale in my Etsy Shop along with many other items which I have made.  What do you think of this pram blanket?  I've joined the squares together using double crochet as I've not mastered a joining technique which holds the squares together as well as double crochet.  I follow Little Dove Crochet on Facebook and Instagram and I do like her method of joining.  I am sure on my next squares blanket I will have to master this technique.


I've also tried to take different photos today of the blanket.  I initially took photos using my phone when I finished the blanket in February, but I didn't feel they showed the colour so well.  Today I went outside in the sunshine to take the photos in an attempt to get better representations of the colours in the blanket.

Sunday, 1 February 2015

New Sewing Machine.

I've not posted on here for a little while, my goals for this year was to blog more and just when I had ideas of things to make and blog posts to write, work (as always) got busy and I decided to decorate my bedroom.  All of which overflowed my stress bucket (for anyone whose completed their Mental Health First Aid Training will know what that is about) and my response for being too stressed is to go quiet and stop communicating.

So what has been going in the crafty world of Sarahdipity?  Well for started I made a rash decision to buy a new sewing machine.  I am now the proud owner of Pfaff Smarter 260c.  It arrived on the 14th January and looked lovely.


Here is a photo of my lovely new sewing machine sat on our dining room table.  It arrived on a Wednesday and I knew I had no time to try it out until the weekend.  So I looked at it, stroked and pushed buttons.

The weekend came, but I needed to move into action with the thoughts of decorating my bedroom.  I had no furniture was living in the spare room and a new bed had arrived.  I didn't want to put the new bed up until I had decorated the room.  So instead of playing on my new toy, my wonderful Pfaff computerized sewing machine with a top loading bobbing, one step button hole and many other features I was looking for, I was painting woodwork, wall and putting up wallpaper for the first time ever in my life.

I got round to trying out my sewing machine for the first time on Tuesday 20th January (almost a whole week later!!!!)  So in my hour of play I used some scrap fabrics and tried out the different stitches.  It didn't look good as I couldn't get the tension right, but after many, many attempts I finally got the tension right and the stitches started to look neat.  I tried out the one step button hole, tried out the button sewing foot I had purchased plus used the quarter inch foot to use some scraps of fabric to start making a simply crazy patchwork.

The sewing machine was silent, easy to use and so much nicer than our old, basic Singer sewing machine,  I'm sure this machine will work lovely after a service as we've owned it for 8 years and we've not had it serviced.  All in all everything with the machine was really lovely, apart from being able to set the tension correctly.

I didn't get a chance to do anymore sewing for another week as I was again busy with work and continuing with my bedroom makeover.  A week later I got back onto the sewing machine.  This time around I finished the simply crazy patchwork and turned it into a square and edged it ready to turn it into a cushion cover.  I also played around with the blind hem foot.  I've got two sets of curtains which need shortening, including lining.  I need to master blind hemming (I've never managed to do it before) so I can turn these curtains up and prevent all the heat from the radiators going up the curtains and not into the rooms.  Quick rant here - I moved into a new build house 8 years ago, now being new build you'd think it would have standard sized windows?!  Oh no, not one window in the house fits standard sized curtains.  Standard curtains are either not long enough or way too long.  Plus all the radiators were fixed under the non-standard sized windows meaning you have to shorten all the curtains to ensure you get all the heat coming from the radiator.  Why not fit standard size windows?!!!!!.

Anyhow the bedroom makeover involves having to shorten the new black out curtains for my bedroom and the curtains.  I also need to shorten the curtains I bought for the dinning room last Christmas too.  I have now mastered the art of blind hemming and so now feel ready to tackle the curtains.  I now need to spend a considerable chunk of time measuring, cutting, pinning and sewing to get them to the right height for the windows and radiators.

I did though by the end of last week finish my cushion cover I had started and here it is.


I made a similar cushion before Christmas which I had for sale in the pop up shop.  This one though has a white centre and white edges unlike the other one I made.  It also has a more distinct swirl pattern to the colours going around the edge.  Another bonus is that it matches the colour scheme in my newly painted bedroom (you can see a sneak peak of the wall paper in the background, my new bed frame and my bedding). This cushion won't be staying in my bedroom, it will go up for sale on Etsy.   I've bought a load of fat quarters to make cushions and other stuff for my bedroom.

What do you think of the cushion?  It took much longer to finish that I expected, but making over a bedroom at the same time doesn't help. Sewing this on my new Pfaff Smarter 260c Sewing Machine was lovely, the fabric moved well, the quarter inch guide foot was a dream to use and help me keep to 1/4 inch seams.  Have you got a new sewing machine?  What do you make?  Let me know.


Tuesday, 25 November 2014

Completing Works in Progress

I  can't believe it's been a whole week since I last posted on this blog. I  feel like so much has happened and that I should have been blogging about it. Obviously I  have not.

This morning I  took the completed patchwork cushions to the Emporia Market Pop Up shop at 1 Bank St, Ashford. Over the we I had attached buttons. In order to do this easily I had bought home the Brother  Innov-is 10a sewing machine home from work. It has a 1 step button hole and a foot for sewing on buttons. It's much easier to use than the simple Singer sewing machine we have at home. The patchwork cushions are £20 each.

Over the weekend I searched through the built in cupboard in my bedroom. I turned it into a storage cupboard for all my cross stitch stuff when we first moved into the house. Cross stitch was my first real love in the world of crafting. I've been doing it for the past 25 years or so. In the cupboard was a completed cross stitch. It was a Margaret Sherry cat design from a  calendar. I remember stitching it about 5 years ago. I hadn't done anything with it afterwards.

As I'm on a cushion making fever at the moment and it's a square design, I want to turn it into a cushion. I didn't have any money to buy fabric to go with the design. But today was payday, and as I  was at the pop up shop, I went and rummaged around the fabric and fat quarters at Emporia Fabric and Crafts and I found exactly what I was looking for. The cat is black, white and grey on an orange background. The selection of fat quarters are grey and orange and work with the colours in the image. I'm looking forward to making a cushion out of all of this.

Monday, 17 November 2014

Creative sewing weekend

On Saturday I completed my first stint at the Emporia Crafts and Vintage Markets Pop Up shop.  I spent the remainder of my spare time stitching away and I made 2 simply crazy patchwork cushions and with some of the scraps I made 3 pin cushions.  I mentioned all of this in my blog post yesterday but I hadn't got any good photos.


Today I finally managed to get my new replacement Motorola Moto G working and managed to take a reasonable photograph consider its dark and I had artificial lights.  I think the phones camera did well, much better than the camera on my Tesco Hudl and my digital camera.

These are the 2 cushions and 3 pin cushions I made.  I really need some pin cushions as the only pin cushions I have are the one in my sewing box and the foam on top of my pack of pins which is now very disintegrated.  I explained on yesterday blogs where I got the pattern from.

At the start of the month I went into Hobbycraft in Maidstone and purchased way more stuff than I had intended.  As part of this stash I had purchased 3 packs of fat quarters which were reduced to less than half price.  These fat quarters were


This is the Visage Textiles Fat Quarters Pastel Patchwork pack of 6.  I have made one cushion and 2 pin cushions from this pack and still have plenty left.  This has created my favourite of the crazy patchwork cushions I have made.  The next pack of fat quarters I purchased was the Visage Textiles Fat Quarters Honesty 6 pack.

I have made one cushion and one pin cushion from this pack.  When I was at the patchwork class last week the instructor talked about having fabrics that blend and you can't see the patchwork effect too well.  I didn't understand what she was saying as I was looking at fabric choice in the same way you choose papers for card making and scrap booking. Whilst I like the colours of the fabrics in the pack I now understand what she means about blending.  The different sections don't stand out in the way the Pastel Patchwork.  When I first bought this pack I thought the fabric would make really good dolls dresses, but instead of making dolls clothes I made a cushion.  I do like the colours in this pack and I am sure the rest of you will do too.

The final pack of fat quarters I purchased were Hobbycraft Medow Craft six pack.  These are a nice mix if  blues and greens which work with the blues and greens in my bedroom.  


I used these fabrics in my first attempt at the simply crazy patchwork and cushion cover.  I enjoyed making this and finally worked out a way of piecing the different strips of fabric together to make a pattern I liked.  Again this pack could "blend" as Mandy said, but with a papercrafting head on I felt the fabrics benefited each other and worked really well in a cushion.  With enough time I am sure I will make some pin cushions with the scraps from this pack.

I hope you all had a good crafty weekend too.  What did you make?  I'd like to hear what you've been making.  Leave me a comment below.


Sunday, 31 August 2014

Another crochet cushion

Following on from last weekends experiment with cushion covers, this weekend I made another cushion using a square of crochet I made in June.  I used the wool that came with Let's Get Crafting Knitting & Crochet Magazine issue 60 and used the pattern for the Shell Cushion cover from issue 56 from Let's Get Crafting Knitting & Crochet Magazine.


This is the cushion.  I made some changes from last weekend's attempts.  My fabric ruler and rotary cutter had arrived from Amazon.  I cut a square 40cm x 40cm and it was very square this time (unlike last weeks)  I cut two pieces for the back 40cm x 30cm.  The crochet square was backed by the square piece of fabric and the back pieces overlapped like last week.  The slightly bigger pieces made for a much better overlap than on the last two cushions.  I don't have a walking foot for the sewing machine yet, and I had the same problem as last week with the top layer of fabric moving as I sewed all the layers together.

On finishing the cushion I then made two button holes and attached two buttons to match the colours in the cushion cover.  I like the effect of the crochet, it has a look of an argyle jumper, even though it is the crochet shell pattern. I would like to sell crochet cushions like this on the Internet for £15 per cushion. I feel this is a realistic price and it does offer some profit on the cost of making the cushion.  What do you think of the cushion?  Would you buy one?  Would you pay £15 for it?  Let me know what you think.

Crochet cushions

For a long time I've been thinking about making cushions out of my new craft skill of crochet.  I made a giant granny square with the wool I had used to make my first ever crochet blanket.  Then I wasn't sure what to do with my square.  I then made an identical square and and double crocheted them together around a cushion inner.  Whilst this created a cushion, it didn't quite make a cushion as I had wanted.  I am very good at spilling stuff on my cushions and they way I had constructed the cushions meant I couldn't remove the cover and wash it if it got dirty.

I've had a plan in my mind about how to create the cushion covers as I've wanted to sew the crochet into a fabric cover.  After many months of thinking about this I finally bought some fabric and last weekend I started to make my first sewn crochet covers.


These are my new cushions.  I bought the 35cm cushion pads from John Lewis, they cost £4 each. The fabric is a cream remnant which I bought from Ashford Fabric Warehouse for £4.  This piece of fabric made the two cushions above and there's enough to make at least two more.  The crochet granny squares were made from the left over wool from the crochet blanket I made.  The cushions are designed to go on my sofa and to co-ordinate with the blanket.  The photos above show the cushions on my sofa with the afghan on the back.

To make the cushion covers I cut out a square of cream fabric 40cm x 40cm and then two pieces 40cm x 35cm to make the back of the cushion.  I measured the square using a tape measure and cut out with my fabric scissors.  The square wasn't very even or square but when I stitched it all together on the sewing machine it came out square and the right size for the cushion pad.  The front of the cushion is made from the crochet square and the fabric square with the two back pieces on the back.  This allows the crochet to be lined and to be removed and washed if anything is spilled on it. It also prevents the cushion pad from showing through the crochet square.

The pillow case fold on the first cushion was too deep as I had always wanted to hold the cover together with buttons.  The second one I made I reduced the size of the pieces on the back of the cushion 40cm x 25cm  The overlap was a much better size for using buttons.  I then sorted through the assorted buttons I had ordered from Amazon and found 4 big red ones to match the crochet.  I then practiced making button holes and created button holes and stitched the buttons on to create an interest on the back.

The pictures above show the completed cushions. I can see my idea will work but it needs a few more tweaks.  I've ordered a fabric ruler and rotary cutter to make a more equal and square shaped pieces of fabric.  I also need to order a walking foot for the sewing machine.  The crochet square is sandwiched between the fabric and works in a similar way to wadding when making a quilt.  This means the top layer of fabric moves when it is being sewn together.  I know that a walking foot prevents this from happening in quilting and I hope it will have the same effect on my crochet covers.

All in all I am very proud of my first attempt at making crochet cushions.  What do you think of them?